Introduction
So I decided to mess around with my Fire 7 tablet and see if I could get a chroot environment of Linux. I used Void because it is quite lightweight and is perfect for testing!
Tutorial
So first off this is what you will need:
- A rooted Android device
- Linux
- A reasonable amount of free space (at least 8GB)
- Void Linux Root FS
Now we can get started!
Download these apps and install them to the device using adb
$ adb install XServer-XSDL-1.20.47.apk
$ adb install ru.meefik.busybox_46.apk
$ adb install com.termoneplus_334.apk
Create an image file to store Linux root fs on and push to device
$ fallocate -l 5G linux.img
$ adb push linux.img /sdcard # Will take a long time
$ adb push void-armv7l-ROOTFS-20191109.tar.xz /sdcard
Start a shell on the device and gain root permissions
$ adb shell
$ su
Create filesystem and mount loopback device
# mke2fs -t ext4 /sdcard/linux.img
# losetup /dev/block/loop7 linux.img
# mkdir /mnt/linux
# mount -t ext4 /dev/block/loop7 /mnt/linux
Extract root FS
# cp /storage/emulated/0/void-armv7l-ROOTFS-20191109.tar.xz /mnt/linux
# xzcat void-armv7l-ROOTFS-20191109.tar.xz | tar xvpf -
Chroot into it
# mount -t proc /proc /mnt/linux/proc
# mount --rbind /sys /mnt/linux/sys
# mount --rbind /dev /mnt/linux/dev
# chroot /mnt/linux /bin/bash
# source /etc/profile
Create a resolv.conf and some networking groups
# cat <<EOF > /etc/resolv.conf
nameserver 8.8.8.8
nameserver 8.8.4.4
EOF
# groupadd -g 3001 aid_net_bt_admin
# groupadd -g 3002 aid_net_bt
# groupadd -g 3003 aid_inet
# groupadd -g 3004 aid_net_raw
# groupadd -g 3005 aid_net_admin
# groupadd -g 3006 aid_net_bw_stats
# groupadd -g 3007 aid_net_bw_acct
# groupadd -g 3008 aid_net_bt_stack
Create your user and configure the sudoers file
# useradd -m -G wheel,3001,3002,3003,3004,3005,3006,3007,3008 noritech
# visudo # Uncomment the %wheel line
# passwd noritech
Switch to user, install desktop environment and xorg packages
# su - noritech
# sudo xbps-install -Syu xorg xorg-server xauth xinit lxde xterm pulseaudio pavucontrol onboard

## If fails at:
[*] Updating repository `https://alpha.de.repo.voidlinux.org/current/armv7l-repodata' ...
armv7l-repodata: 235KB [avg rate: -155KB/s]
libcrypto45-3.0.2_2 in transaction breaks installed pkg `libressl-2.9.2_1'
libcrypto45-3.0.2_2 in transaction breaks installed pkg `libtls19-2.9.2_1'
libssl47-3.0.2_2 in transaction breaks installed pkg `libressl-2.9.2_1'
libssl47-3.0.2_2 in transaction breaks installed pkg `libtls19-2.9.2_1'
Transaction aborted due to unresolved dependencies.

## Install these:
# sudo xbps-install libressl libtls19
Test the X server by starting it
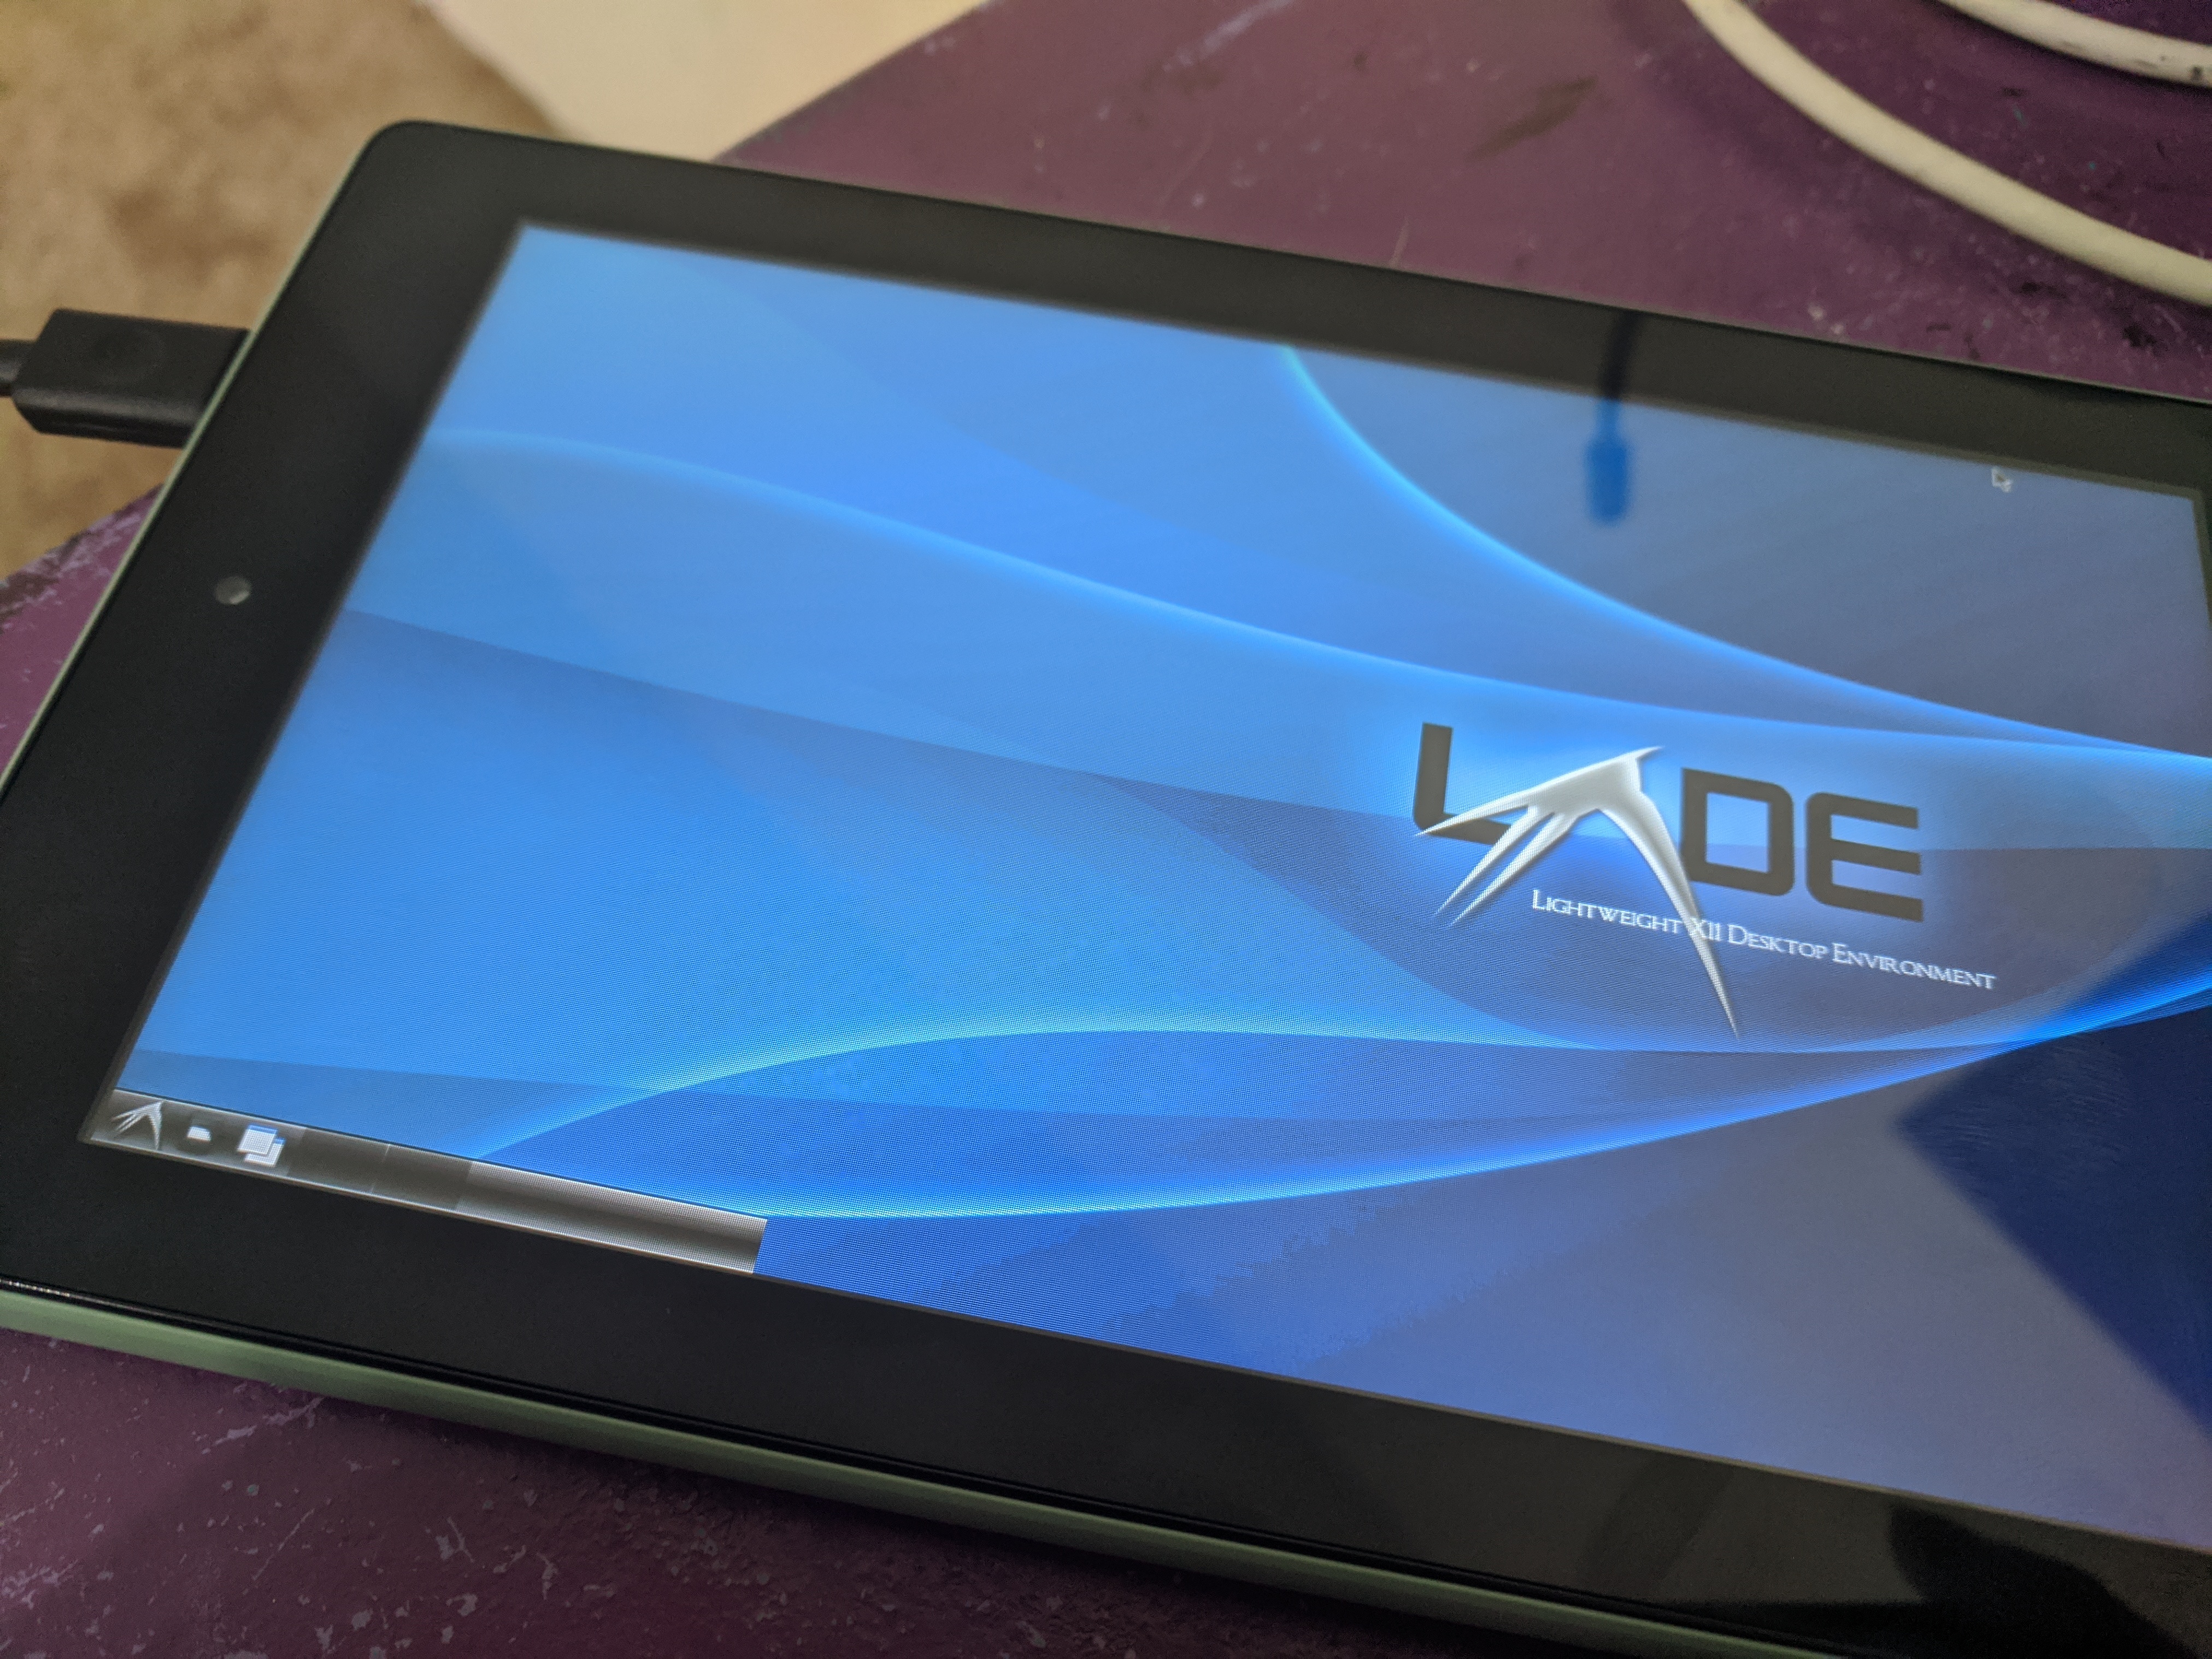
# export DISPLAY=:0 PULSE_SERVER=tcp:127.0.0.1:4713
# exec startlxde
If that works you can create an init script to run in chroot that looks like this:
#!/bin/bash
USER="noritech"
source /etc/profile

# Switch over to user
su - ${USER} << EOF
# Start X server
export DISPLAY=:0 PULSE_SERVER=tcp:127.0.0.1:4713
exec startlxde &
EOF
Then start it with
chroot /mnt/linux /bin/bash -l /init.shYou can start your chroot with a script like this:
#!/system/bin/sh

test -d "/mnt/linux" || {
  mkdir /mnt/linux
}

if ! mountpoint -q /mnt/linux; then
  losetup /dev/block/loop7 /sdcard/linux.img
  mount /dev/block/loop7 /mnt/linux
fi

if ! mountpoint -q /mnt/linux/dev; then
  mount -t proc /proc /mnt/linux/proc
  mount --rbind /sys /mnt/linux/sys
  mount --rbind /dev /mnt/linux/dev
fi

chroot /mnt/linux /bin/bash -l /init.sh
Put chroot script in an executable place like
/data/localStart chroot with the script after launching XServer XSDL
$ su
# /data/local/chroot.sh
Conclusion
I may have missed something but I hope I didn’t. I was bored and wanted to try creating a Void chroot on my Amazon Fire 7 tablet. Hopefully someone finds this helpful, let me know if there’s anything I can improve.